Configuring the OPC Fire Library
Scenario: You want to configure the OPC Fire Library for supporting a 3rd-party system.
Reference: For background information, see the reference section.
Workflow diagram:
Prerequisites:
- The Danger Management > Fire 3rd Party extension module is installed and included in the active project.
- System Manager is in Engineering mode.
- System Browser is in Management View.
Steps:
Before you configure anything, the first step is to create a customized copy of the original library that comes with the extension module. You do this by selecting the objects, functions, and text groups that you need from the original library (under Headquarter), and copying them to a different customization level (the default target customization level is Project). The customized library that you create in this way will not be overwritten if the original library is updated.
Proceed as follows:
- System Browser is in Engineering mode.
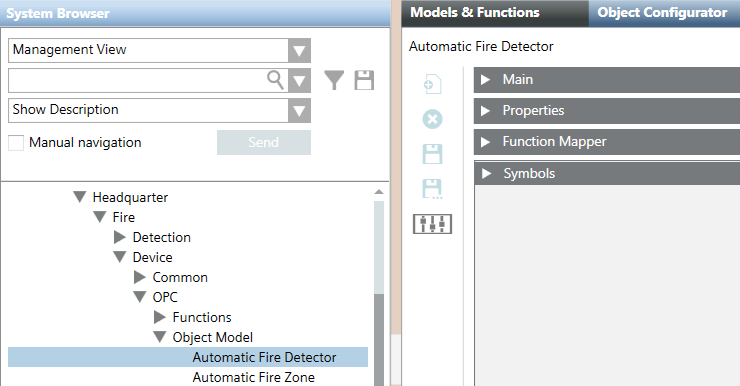
- Select Project > System Settings > Libraries > Headquarter > Fire > Device > OPC.
- In the Headquarter OPC library tree, under Object Model, select an object that you want to use (for example, Automatic Fire Detector).
- Click the Models & Functions tab.
- Click Customize Function
 .
.
- A confirmation box displays.
- Click OK.
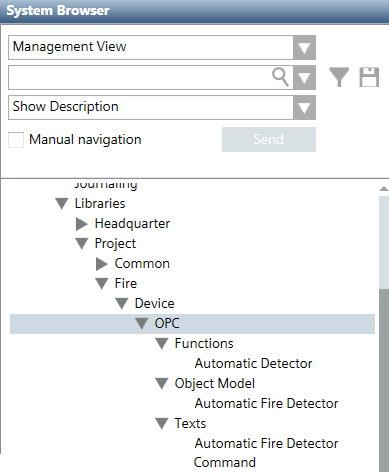
- The object is copied to the target customization level (for example, Project > System Settings > Libraries > Project).
NOTE: The tree structure of the customized library is automatically created.
- In the Headquarter OPC library tree, under Functions, select the function relating to the object (for example, Automatic Detector).
- Repeat the previous three steps for the function.
NOTE: The objects Input and Output have multiple functions available. For these, you can customize more than one function. To do this, apply this step to each function that you want to use with the object.
- In the Headquarter OPC library tree, under Texts, select the text group relating to the object or to the function (for example, Automatic Fire Detector).
NOTE: You can copy text groups only if at least one object or function has been customized.
NOTE: If you customized an object with multiple functions, you still only need one text group for the object. Select the text group corresponding to any one of the functions you customized for the object. For using generic objects, see DELETED_Use Generic Objects in the OPC Fire Library.
- Click the Text Group Editor tab.
- Click Save As
 .
.
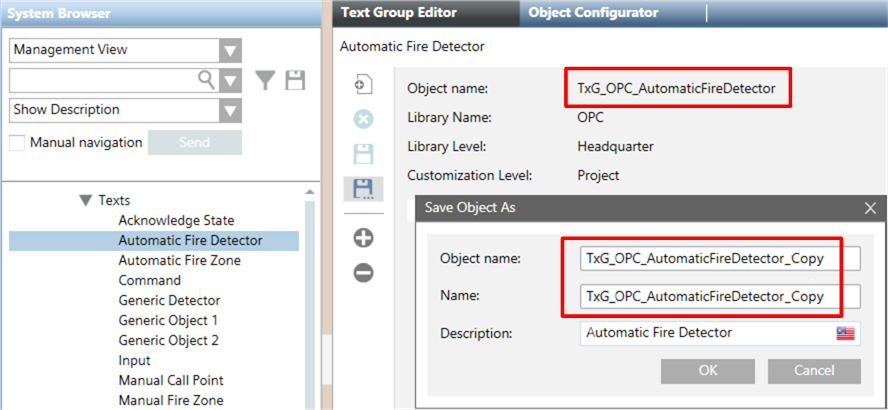
- In the Save Object As dialog box, do the following:
a. Enter the name of the text group in the Object name and Name fields. The name must be different from the name of the original text group (see Image Text Groups Are Copied with a Different Name). For example:TxG_OPC_AutomaticFireDetector_Copy
instead of the original:TxG_OPC_AutomaticFireDetector
b. Type a descriptive text in the Description field (which can be the same as the original one, for example,Automatic Fire Detector).
- A confirmation box displays.
- Click OK.
- The text group is copied to the customization level.
- Repeat the procedure for all objects, functions, and text groups you need, according to the Table Relation Among Objects, Functions, and Texts.
- If necessary, also copy the Command text group.
NOTE: Usually, you can use the same value to represent a state (input) and the corresponding command (output). However, some OPC devices require a command value that doesn’t match the state value written by that command (for example, to set the value 1 in the OPC server, the command must send the value 25). To address such cases, use the Command text group (available for all objects), that makes all command-specific values available in a separate list.
Customized objects remain linked to the text groups of the original OPC library. You need to update the customized objects so that they instead link to the customized text groups, which have a different name from the original ones. Proceed as follows:
- Restart the client application, to make the customized text groups available for selection.
- In the customized OPC library tree, under Object Model, select an object (for example, Automatic Fire Detector).
- Click the Models & Functions tab.
- Open the Properties expander.
- Select the Status property.
- Open the Details expander.
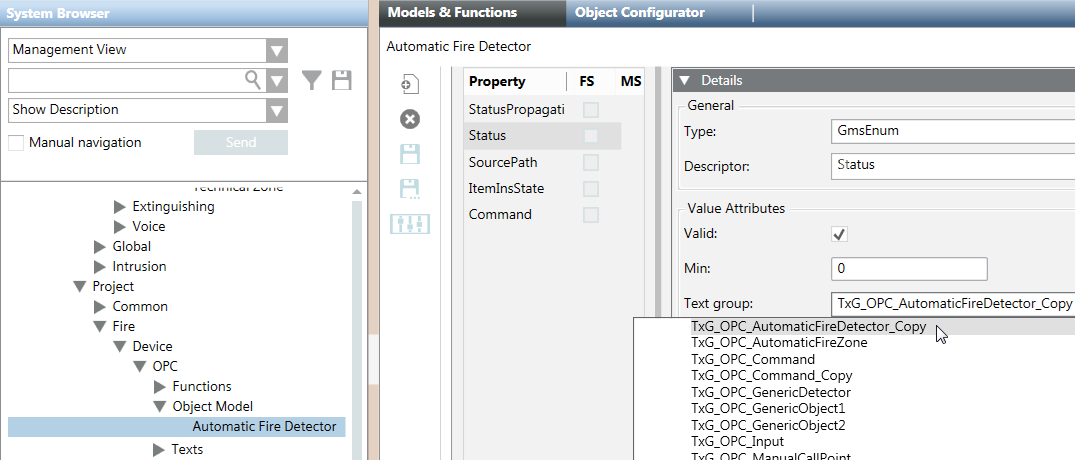
- In the Text group drop-down list, select the customized text group to link to the object (for example, TxG_OPC_AutomaticFireDetector_Copy).
- Repeat steps 2 to 7 to link each object to its customized text group.
- To link to the object also the customized Command text group:
a. Select the Command property.
b. Open the Details expander.
c. In the Text group drop-down list, select the customized text group (for example, TxG_OPC_Command_Copy).
- In the customized OPC library, under Texts, select a text group (for example, Automatic Fire Detector).
- Click the Text Group Editor tab.
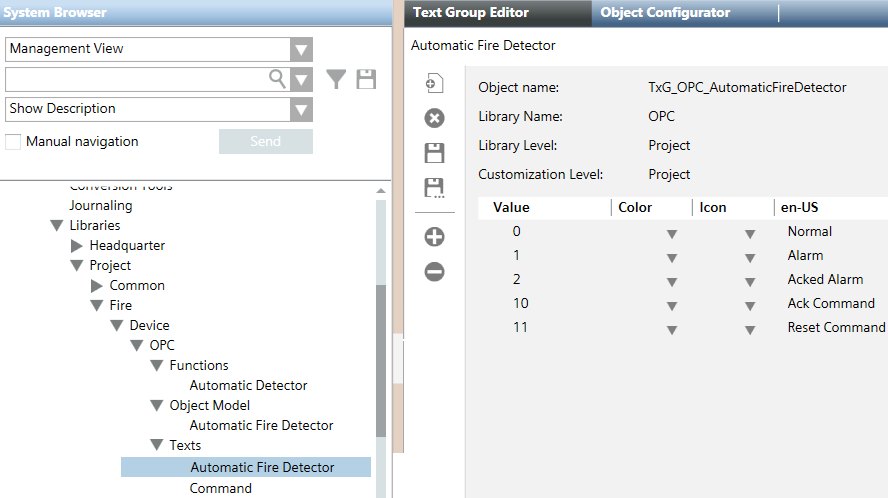
- Type in the values you need and a descriptive text for each value. See Figure Text Group Configuration With Output and Input Values of the OPC Server for an example, where values 0 to 2 are input values (values which come from the OPC server representing the fire system: Normal, Alarm, Acked Alarm) and values 10 and 11 are output values (values which the OPC server waits for: Ack and Reset commands).
- Four value rows (values 0 to 3) are available by default.
- To type in or modify a value or a descriptive text, click in the respective column of the value row to show the text field.
- To add a value, click Add new row
 .
.
- To delete a value, select the value and click Delete selected row
 .
.
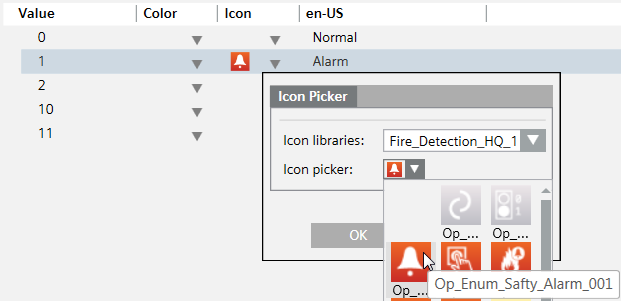
- (Optional) Assign an icon to a value.
a. Click to show the Icon Picker.
b. Select a fire icon library, for example the Fire_Detection_HQ_1 library.
c. Select the icon.
d. Click OK.
- Click Save
 .
.
- Repeat the procedure for all text groups for which it is necessary to provide specific texts for the values, including the Command text group for command-specific values (if needed).
Alarms display in Event List (see Figure The Configured Alarm Displays in Event List) and in the Extended Operation tab of the OPC Network data points (see DELETED_Configure OPC Fire Commands).
- In the customized OPC library, under Object Model, select an object (for example, Automatic Fire Detector).
- In the Model & Functions tab, open the Properties expander.
- Click the Status property.
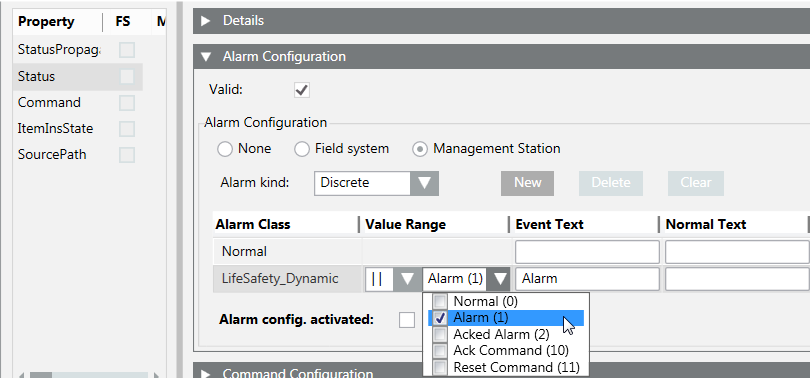
- Open the Alarm Configuration expander.
- Select the Valid check box.
- Select the Management Station option button.
- From the drop-down list of the Alarm Class column, select an alarm class (for example, LifeSafety_Dynamic).
Select only alarm classes ending with "_Dynamic", to fully manage commands in Event List.
- From the drop-down list of the Value Range column, select the input value to associate to the alarm class (for example, the value Alarm (1), which you typed in the associated text group.
- In the text field of the Event Text column, type the text to display in Event List.
NOTE: For detailed information about alarm configuration, press F1 for the online help.
- Select the Alarm config. activated check box, to activate the alarm.
- Repeat the procedure for all objects.

Commands are managed in the Operation and Extended Operation tab of the Contextual pane of the OPC Network data points (see Figure Command Buttons in the Extended Operation Tab). The Ack and Reset commands are also available in Event List.
- In the customized OPC library, under Object Model, select an object (for example, Automatic Fire Detector).
- Click the Model & Functions tab.
- Open the Properties expander.
NOTE: The Ack and Reset commands are configured in the Status property, while other commands are configured in the Command property. See following instructions.
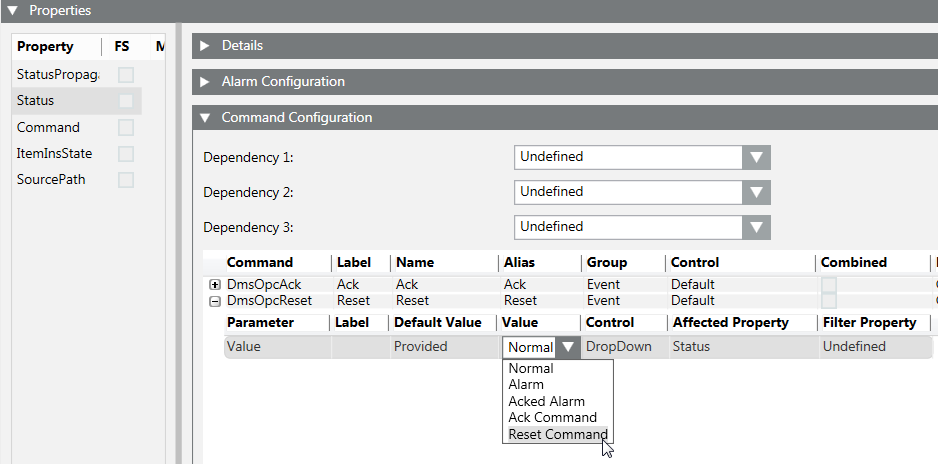
- Click the Status property and open the Command Configuration expander to configure the Ack and Reset commands.
- For each command (DmsOpcAck and DmsOpcReset), from the drop-down list of the Value column, select the output value to send to the OPC server. For example, Ack Command (for DmsOpcAck) and Reset Command (for DmsOpcReset), which you typed in the associated text group.
NOTE: Click or
or  to collapse or expand a single value row.
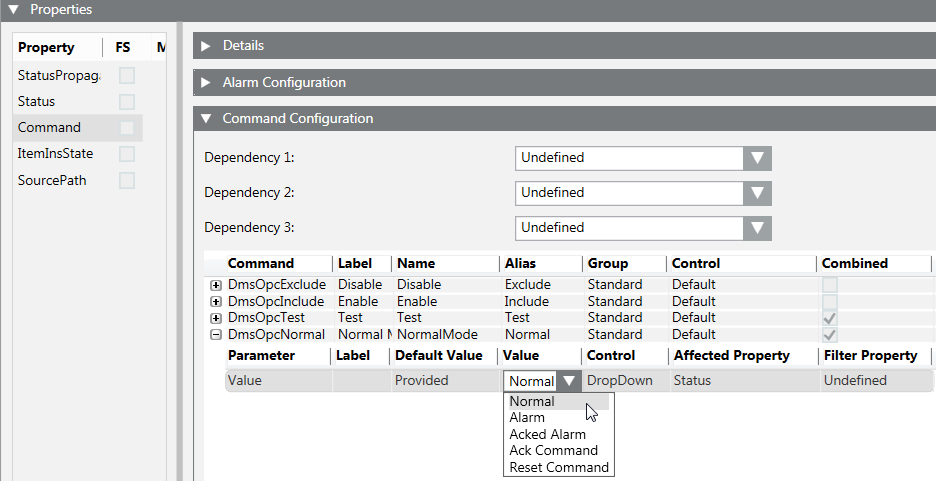
- Click the Command property and open the Command Configuration expander to configure other available commands (if needed).
- For each command, from the drop-down list of the Value column, select the output value to send to the OPC server. For example, Normal (for Normal command), which you typed in the associated text group.
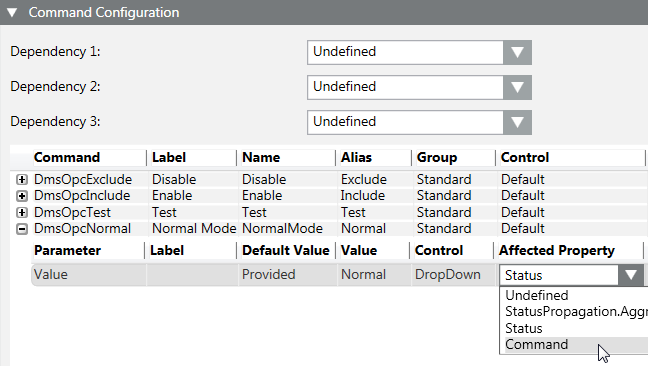
- To select commands from the Command text group, select Command from the drop-down list of the Affected Property column.
- Click Save
 .
.
- Repeat the procedure for all objects.
NOTE: For detailed information about command configuration, press F1 for the online help.

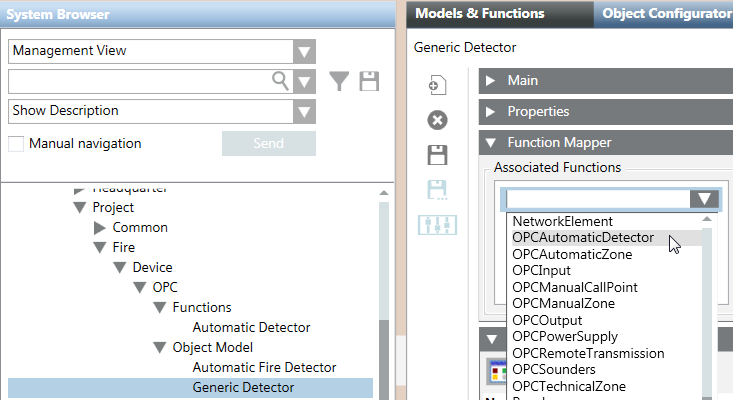
The Object Model list includes three generic objects (Generic Detector, Generic Object 1, and Generic Object 2), available for special cases, such as video objects. To use the generic objects, you need to link the generic object to a function manually. Proceed as follows:
- In the customized OPC library, under Object Model, select the generic object you customized.
- In the Models & Functions tab, open the Function Mapper expander.
- Click Add.
- A drop-down list displays in the Associated Functions box.
- From the drop-down list, select at least one customized function to link to the generic object.
- Click Save
 .
.
- Proceed with the common configuration: copy and link to the generic object the relating generic text group, configure alarms and commands.
